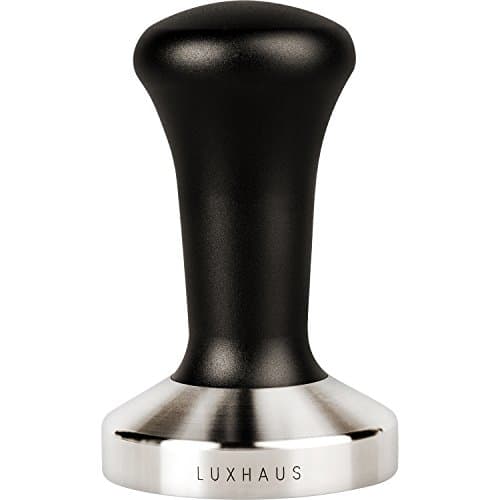
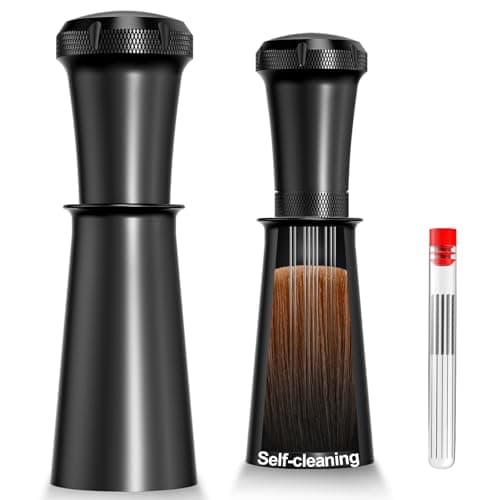
These two get compared as if you have to choose, and you do not — they solve different halves of the same failure. Here is the whole answer in two sentences. A WDT tool stirs the dry grounds with fine needles to break up clumps, so the coffee is evenly distributed before you compress it. A tamper compresses that bed flat and level, so water meets uniform resistance. Distribution first, compression second, and neither can do the other's job.
If you are buying one, buy the tamper: it is not optional, because without it the coffee is not compressed at all and the shot gushes. The WDT tool is the optional one that punches well above its price — it costs a fraction of a tamper and often produces a more visible improvement, because clumping is the specific thing most home setups are getting wrong.
There is one important exception that decides the whole question for a lot of people, and it is worth checking before you spend anything. If your machine uses a pressurized (dual-wall) basket — standard on most machines under about $300, and included with every Breville — then the basket, not the coffee, creates the resistance. On that setup puck preparation barely registers, and a WDT tool is close to a waste of money. The mechanism is in pressurized vs non-pressurized portafilters.
What each one actually does
Ground espresso does not fall into a basket as loose, even powder. It comes out of the grinder in clumps, held together by static and by the fines that coat everything, and it lands unevenly with a mound under the chute. A WDT tool — the name is from the Weiss Distribution Technique — is a handful of very fine needles you stir through that dry coffee to break the clumps apart and level the surface. A tamper then compresses the whole bed into a flat, dense puck. The order matters and is not interchangeable: tamping a clumpy bed produces a firmly packed uneven puck, and stirring after tamping just wrecks the puck you made.
Why channeling is the thing both of them are fighting
Water under nine bars of pressure does not politely soak through coffee — it finds the weakest path and runs down it. If part of the bed is looser than the rest, that is where all the water goes: the loose channel over-extracts into bitterness while the rest of the puck barely extracts at all, which is why a channeled shot tastes sour and bitter at the same time and comes out thin. Clumps make loose patches. A gap at the rim from a mis-sized tamper makes a loose ring. Both tools exist to remove those weak paths, from the inside and from the top.
The order, and how long it takes
Grind into the basket. Stir with the WDT tool — a few seconds, needles down to near the base, moving in small circles rather than sweeping across. Settle the basket with a light tap. Tamp level, once, with steady pressure. That is it: about ten seconds added to your routine. The most common mistake is over-stirring, which fluffs the bed rather than evening it; the second most common is tamping at an angle, which builds a wedge that water runs down the thin side of.
When the WDT tool is genuinely a waste of money
On a pressurized dual-wall basket. These have a single small exit hole beneath a second wall and generate their own back-pressure, so any grind and any distribution produce a crema-like foam. They are what make sub-$300 machines forgiving, and they are also why puck-prep upgrades do nothing on them — the basket, not your coffee, is controlling the shot. Every Breville ships with a pair, and many owners never switch. If that is you, buy the tamper, skip the WDT tool, and either switch to single-wall baskets or put the money into fresher beans.
Do you need a distribution tool as well?
A palm-style distributor or leveler is a third thing, and it is not a substitute for either of these. It spins on top of the coffee to level the surface before tamping, which looks tidy and works only on the top few millimeters — it cannot reach clumps deeper in the bed the way needles can. Some tampers combine a distributor head and a tamper base in one tool, which is a reasonable space saver. None of them replaces a WDT tool, and all of them are optional. Our tamper roundup includes a combined distributor-and-tamper option if that appeals.
What to spend, in what order
Correctly sized tamper first, always. WDT tool second if you are on single-wall baskets, because it is the cheapest visible improvement available. A scale before either upgrade beyond that, because it makes everything else measurable. Then, if you want to see whether any of it is working, a bottomless portafilter — the only way to actually watch channeling happen. That whole ordering, with the picks, is our starter accessory kit, and the wider setup sequence is our home espresso setup guide.
How we picked
We did not lab-test this gear
Everyone in this category says they tested twenty machines. We have not lab-tested any of these, and we say so. What we did instead: compiled the published manufacturer specifications, read the manuals, ran the math where there was math to run (heat-up time, pressure, dose capacity, grind range, cost per cup), and scored each pick against a published rubric. The scores are judgments from documented research — not measurements we took, because we do not have a lab and we will not pretend we do. Where a number came from someone else's work, we name them in Sources.